
How Do I Launch an AI Powered Campaign?
AI Powered Campaigns allow Hazel to reach out to your contacts and have conversations on your behalf by text and/or phone.
Before getting started, make sure your account is on an AI Powered plan. If it isn't, you'll be prompted to select an AI Powered plan when you create your campaign.
Step 1: Create Your AI Campaign
Go to Campaigns > AI Powered Campaigns and click Add Campaign.
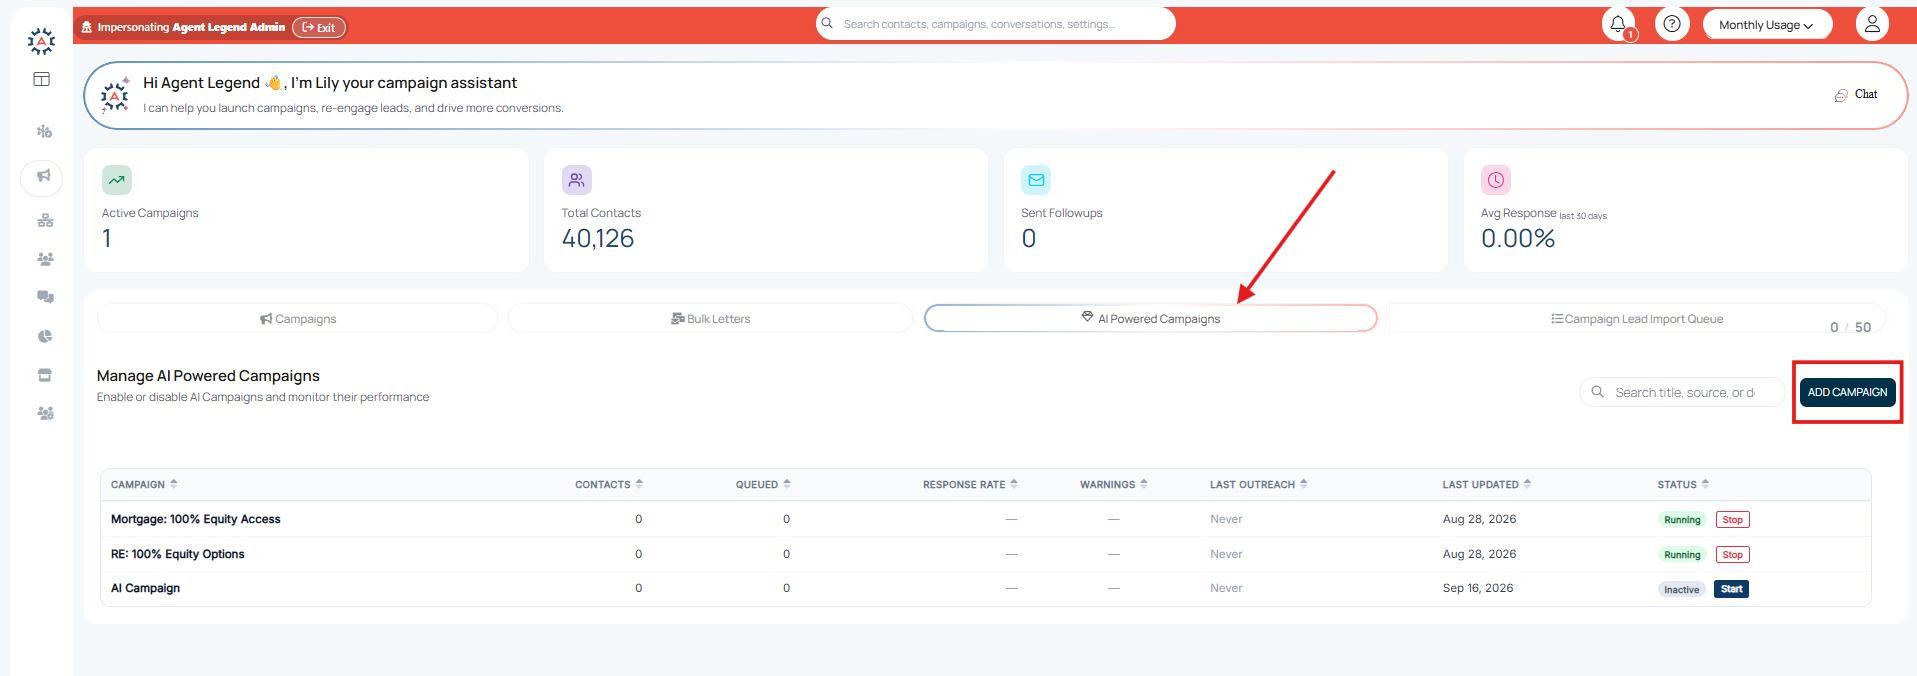
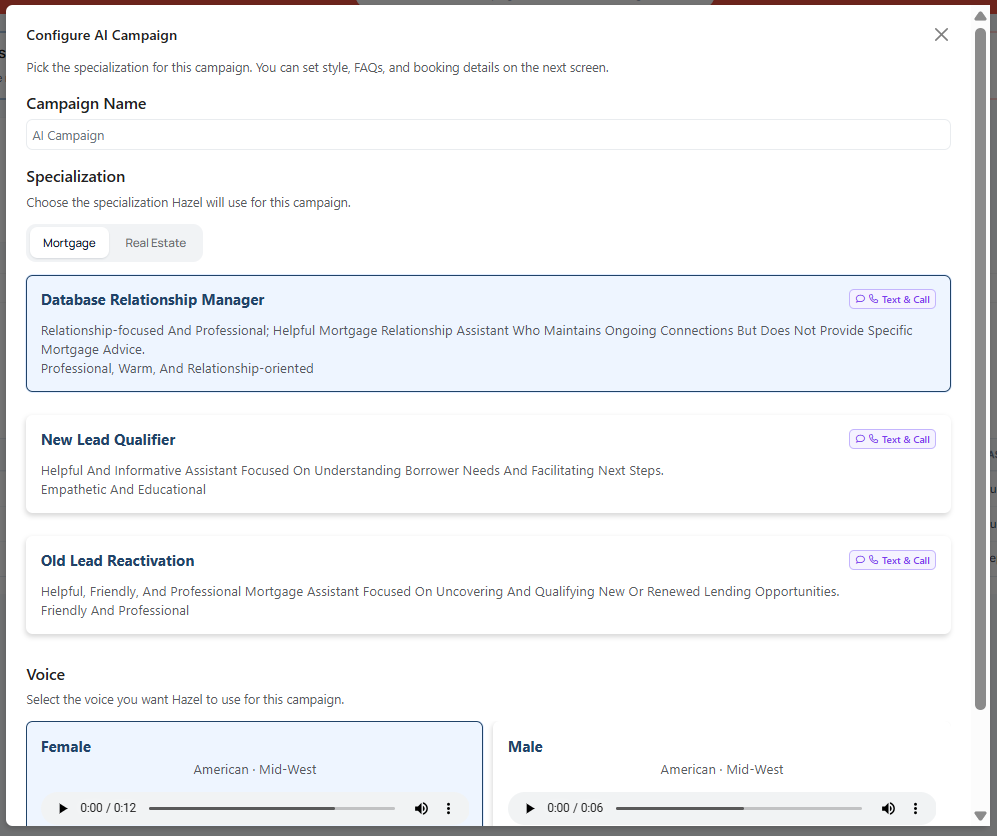
Enter a name for your campaign, then select your:
Industry and Specialization
Choose your industry and the type of campaign you want to run.
Available specializations may include:
- New Lead Qualifier
- Old Lead Reactivation
- Relationship Nurture
The available specializations will depend on whether you're using Real Estate or Mortgage.
Voice
If your campaign includes calling, select the voice you'd like Hazel to use.
You can preview the available voices before making your selection.
When you're finished, click Create Your Campaign.
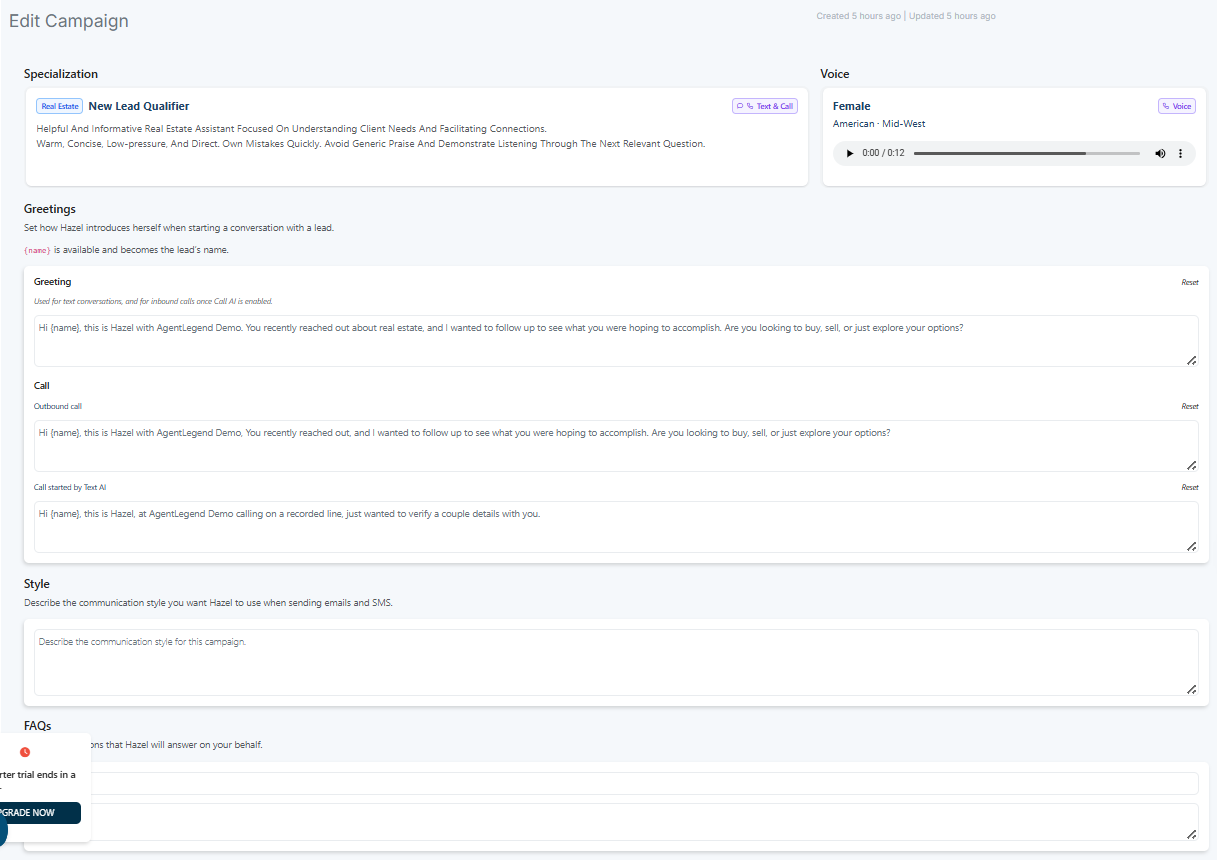
Step 2: Configure Your Campaign
Once your campaign is created, you'll be taken to the campaign settings.
Greetings
These are the messages Hazel uses when starting a conversation.
You can use {name} to automatically insert the contact's first name.
You'll see separate fields for:
- Greeting — Used for text conversations and inbound calls when Call AI is enabled.
- Outbound Call — Used when Hazel makes an outbound call.
- Call Started by Text AI — Used when Hazel starts a call from a text conversation.
You can use the default messages or make small adjustments to fit your campaign.
Best Practice: We recommend updating the name of your AI Agent here, and make sure the branding is correct for your business.
Style
The Style field tells Hazel how you want it to communicate during the campaign.
For example:
Friendly, conversational, helpful, and concise. Keep the conversation natural and low-pressure.
Important: Keep your Style instructions simple. Avoid adding a long list of rules, detailed scripts, or instructions that conflict with the campaign's existing behavior. Too many or overly specific instructions can cause Hazel to produce unexpected results.
FAQs
Add questions and answers that Hazel may need to reference when talking with your contacts.
For example:
Question: What areas do you work in?
Answer: I work with clients throughout the greater Portland area.
Add information that is specific to your business, service area, or campaign that Hazel wouldn't otherwise know.
Best Practice: Only add information you're confident is accurate and that you want Hazel to use when answering contacts.
Calendar Booking
If you add a Calendly or other calendar booking link, Hazel can share that link with the contact when appropriate so they can select an available time and book directly.
No calendar link? Hazel will still attempt to handle appointment booking for you. In this case, Hazel may select a time and you'll receive an email with a calendar invite once the appointment is booked. The invite is not sent to the contact automatically. Be sure to add the lead to the calendar event and send them the invitation so they receive the appointment details.
Important: Hazel shares the calendar link with the contact — the contact still completes the booking through your calendar. Make sure the link is active and that your calendar availability is up to date before launching your campaign.
Step 3: Save and Turn On Your Campaign
When you've finished configuring your campaign, click Save Changes.
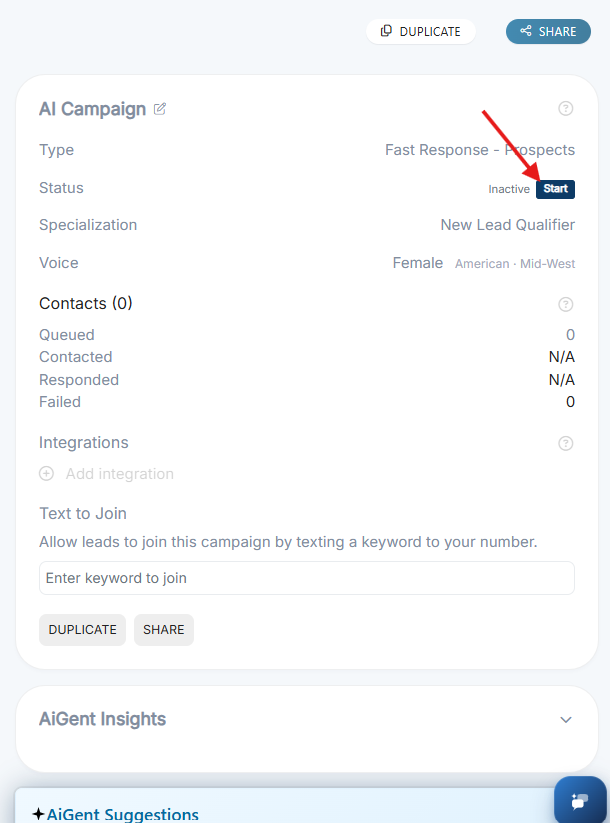
Your campaign will need to be ON/Running before Hazel can begin engaging with contacts.
Best Practice: Before turning your campaign on, review your greetings, FAQs, Style, and calendar link to make sure everything reflects how you want Hazel to communicate.
Step 4: Add Contacts to Your Campaign
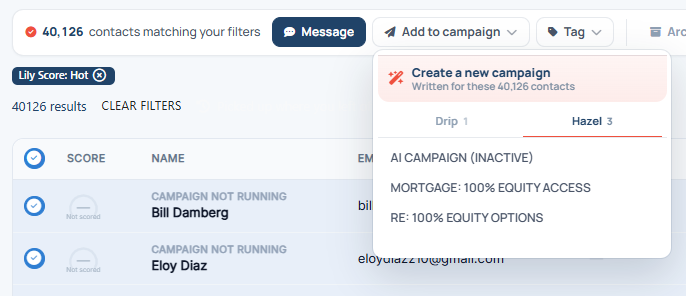
Go to Contacts and use your filters to find the contacts you'd like Hazel to engage.
Select the contacts you'd like to add, then click Add to Campaign.
Under the Hazel tab, select the AI Campaign you created.
The selected contacts will then be added to your campaign.
Start Small
If this is your first AI Powered Campaign, we recommend starting with a smaller group of contacts.
This gives you an opportunity to review Hazel's conversations and make any necessary adjustments before adding a larger group.
You can also add contacts to your AI Campaign automatically through a standard integration or by uploading leads.
Best Practices
A few things to keep in mind when setting up your AI Powered Campaign:
Keep it simple.
Hazel is already configured with the instructions needed to run the campaign. Avoid adding excessive instructions or rewriting the Style field extensively.
Review before launching.
Take a moment to review your greetings, FAQs, calendar link, and campaign settings before turning the campaign on.
Start with a small group.
Test your campaign with a smaller group of contacts first so you can see how Hazel handles real conversations.
Give Hazel accurate information.
Only add FAQs and business information that are current and accurate.
Keep your calendar up to date.
If you're using a calendar link, make sure contacts can access it and that your availability reflects when you're actually available for appointments.
That's It!
Once your campaign is configured, turned on, and your contacts have been added, Hazel can begin engaging with them on your behalf.
As you review conversations, you can make small adjustments to your campaign as needed.
How to Launch an AI Powered Campaign