
Zapier automatically moves information between your web apps, so you can focus on your most important tasks first. A Zapier integration with Agent Legend is the easiest way to automate your work, allowing you to prioritize contacts quickly and efficiently. It also makes it easy to connect contacts from sources that don't currently integrate with Agent Legend. This means better contact follow-up, more conversations, and ultimately more closed deals for your real estate business.
Zapier Integration Uses and Benefits
- Each new contact is tracked through Zapier
- New contacts are noted and followed up with automatically
- Reminders about contact follow-up based on age and level of previous interaction
- Never lose track of contacts or follow-up scheduling
How to Integrate Zapier
- Login to your Zapier account.
- In Zapier, on the left hand side of the screen, click on the Make a Zap button.
- Select Google Sheets as the app (search this in the search bar at the top if you don’t see it as an option below).
- Select New Spreadsheet Row as the Trigger Event. Click the Continue button.
- Select your Google Sheet account. Click the Continue button.
- Go down to the Spreadsheet bar and select the correct spreadsheet from the drop-down menu.
- If you have multiple sheets inside the spreadsheet then be sure to select the correct Worksheet in the bar below. If there are not multiple sheets inside the spreadsheet just skip this step. Click the continue button.
- Click the Test Trigger button. Check to be sure the information displays properly. Click the Continue button.
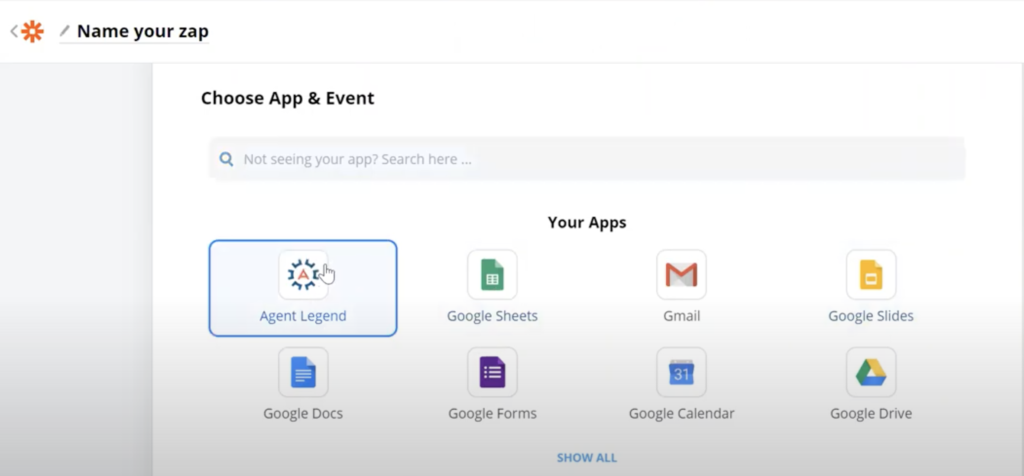
- In the App & Event bar select Agent Legend. Under Choose Action Event select Add Prospect to Campaign. Click the Continue button.
- Log into your Agent Legend account. Click the Continue button.
- Select which campaign you want the contacts added to. In the following boxes match the information with what you want displayed (typically this will be email address with email address, first name with first name, etc.). You can skip any information that you don’t want to be displayed.
- Click the Test and Review button. If the test is successful then click on Done Editing at the bottom of the page. Then on the next page that displays click the Turn Zap On button. You’re done!
Extra Support
You can view and manage all of your existing integrations in the integrations tab located on the left side of the screen.
This video will walk you through the integration process. Zapier is a third party solution, so while our support team will assist to the best of their abilities, there will be things that they do not know regarding the usage of Zapier.